DIY Wall Decor: 5 Easy Projects for a Personalized Touch
---
**DIY Wall Decor: 5 Easy Projects for a Personalized Touch**
Are you looking to add a personal touch to your home decor? Look no further than DIY wall decor projects! With just a few simple materials and a little bit of creativity, you can create beautiful and unique wall art that reflects your personal style. In this article, we'll explore five easy DIY wall decor projects that you can complete in no time.
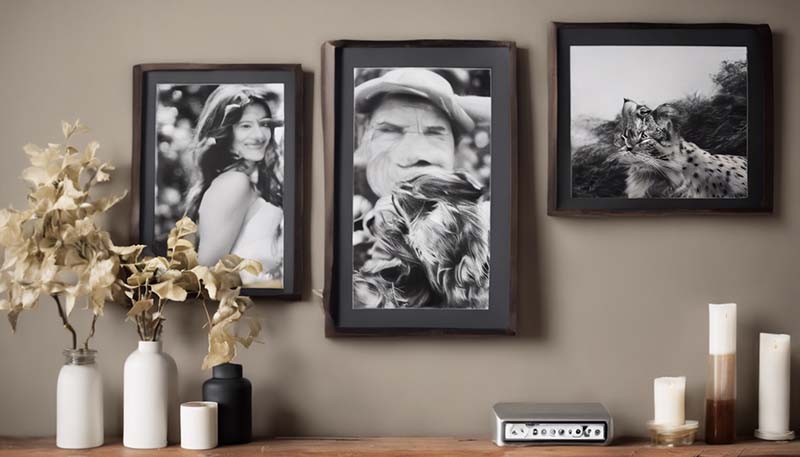
**1. Photo Wall Collage**
One of the easiest and most personal ways to decorate your walls is with a photo collage. This project allows you to showcase your favorite memories and create a visual representation of your life. Here's how to create a stunning photo wall collage:
**Materials:**
- A selection of your favorite photos
- A variety of frames in different sizes and styles
- A level
- A ruler
- A pencil
- A tape measure
- Push pins or adhesive strips
**Instructions:**
1. Choose a wall where you'd like to create your photo collage. Consider the layout and how many photos you'd like to include.
2. Use a level and a ruler to measure and mark the placement of each frame on the wall. Be sure to use a pencil so that you can easily erase any mistakes.
3. Use push pins or adhesive strips to hang each frame on the wall, following the markings you made with the pencil.
Advertisement
4. Arrange the frames in a visually appealing way, mixing and matching different sizes and styles.
5. Step back and admire your beautiful photo wall collage!
**2. String Art**
String art is a fun and modern way to add a pop of color to your walls. This project involves using nails and string to create a unique design on a canvas or wood panel. Here's how to create your own string art:
**Materials:**
- A canvas or wood panel
- Assorted nails in different sizes and colors
- A hammer
- A level
- A pencil
- A tape measure
- String or yarn in a variety of colors
**Instructions:**
1. Choose a design for your string art. This could be a simple shape, a word, or a more complex pattern.
2. Use a pencil to lightly mark the design onto your canvas or wood panel.
3. Use a level and a hammer to secure the nails into the panel, following the marked design.
4. Once all the nails are in place, start weaving the string or yarn around them to create your design. You can use different colors and patterns to add visual interest.
5. When you're finished, trim any excess string and secure the ends with a knot or glue.
**3. Pallet Art**
Pallet art is a rustic and budget-friendly way to add a touch of personality to your walls. This project involves repurposing old wooden pallets into unique and eye-catching wall art. Here's how to create your own pallet art:
**Materials:**
- Old wooden pallets
- A saw
- Sandpaper
- Paint or wood stain
- A paintbrush or sponge
- A level
- A hammer
- Nails
**Instructions:**
1. Choose a design or pattern for your pallet art. This could be a simple shape, a word, or a more intricate design.
2. Use a saw to cut the pallets into the desired shapes and sizes.
3. Sand the edges and surfaces of the pallet pieces to smooth them out and remove any rough spots.
4. Paint or stain the pallet pieces in your chosen colors.
5. Once the paint or stain is dry, arrange the pallet pieces on the wall in your desired design.
6. Use a level, hammer, and nails to secure the pallet pieces to the wall.
**4. Washi Tape Wall Art**
Washi tape is a versatile and affordable material that can be used to create a variety of wall art designs. This project involves using colorful and patterned washi tape to create a unique and eye-catching design on your wall. Here's how to create your own washi tape wall art:
**Materials:**
- Assorted washi tape in different colors and patterns
- A level
- A ruler
- A pencil
- A tape measure
**Instructions:**
1. Choose a wall where you'd like to create your washi tape wall art.
2. Use a level, ruler, and pencil to measure and mark the placement of your design on the wall.
3. Start applying the washi tape to the wall, following the markings you made with the pencil. Be sure to press the tape firmly to ensure it sticks well.
4. Continue adding washi tape to create your desired design. You can use different colors and patterns to add visual interest.
5. When you're finished, step back and admire your beautiful washi tape wall art!
**5. Hanging Planters**
Hanging planters are a stylish and functional way to add some greenery to your walls. This project involves creating hanging planters from simple materials like wood or metal, and filling them with your favorite plants. Here's how to create your own hanging planters:
**Materials:**
- Wood or metal hanging planters
- A variety of plants
- Potting soil
- A drill
- Screws or hooks
- A level
- A hammer
**Instructions:**
1. Choose a wall where you'd like to hang your planters. Consider the amount of sunlight the area receives and the size of the plants you'd like to include.
2. Use a level, drill, and screws or hooks to secure the hanging planters to the wall. Be sure to space them evenly and at a comfortable height for watering and maintenance.
3. Fill each planter with potting soil, leaving enough room at the top for your plants.
4. Choose a variety of plants to fill your hanging planters. Consider plants with different textures, colors, and sizes for a visually appealing arrangement.
5. Care for your hanging planters by watering them regularly and providing them with the appropriate amount of sunlight.
**Conclusion**
DIY wall decor projects are a fun and affordable way to add a personal touch to your home decor. With a little bit of creativity and some simple materials, you can create unique and eye-catching wall art that reflects your personal style. Whether you choose to create a photo collage, string art, pallet art, washi tape wall art, or hanging planters, these projects are sure to add a touch of personality and charm to your walls.
So, gather your supplies and get ready to unleash your inner artist. With these five easy DIY wall decor projects, you'll be well on your way to creating a beautiful and personalized space that you'll be proud to call home.
---
I hope you find this article helpful and inspiring! Let me know if you have any questions or if there's anything else I can assist you with.